This article is specific to our Video product offering. You can find more information about our product offerings here.
Overview
Remesh Video allows you to bring face and voice to your research by conducting 1:1 and group interviews and collect deeper qualitative insights. Whether used on its own or alongside Live and Flex, Remesh Video makes it simple to connect, moderate, and uncover insights—faster.
Creating and Building your Video Conversation is the first step to successfully conducting your Remesh interviews with participants.
You can also use Remesh Live as a precursor to your Video Interviews! Use Remesh Live identify your Video Interview participants, then invite them to your follow up face-to-face research in Remesh Video. Learn more here!
Included in this Article
- Creating Your Video Conversation
- Building Your Video Conversation
- Moderating Your Video Interview
- Sending Remesh Questions to Participants
- Backroom Chat
- Ending Your Interview
- Frequently Asked Questions
Creating Your Video Conversation
- Click the Blue “+” button in the platform.
- Select Video.
- Enter Conversation Name Note: Conversation Name is for internal use and participants will not be able to see this. This section can be used for P.O. numbers for easy tracking of projects
- You can choose any team that you’re a member of will appear on the list and can be selected. Note - unlike other Conversations, you are not able to create Non-Billable or Private Video Conversations.
- Select your use case from the drop-down menu. (optional)
- Click Create.
Building Your Video Conversation
Building your Video Conversation allows you to change your settings and outline content that you would like your participants to see. The following detail the sections you will pre-program during the build phase.
1. Basic Details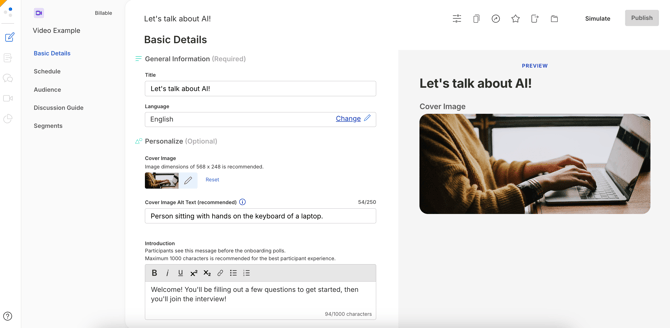
Basic Details allows you to program a welcome screen that participants will see when they join your Video Conversation. Along with choosing your language settings, and programming an optional introduction message. You can read more about the different elements of the Basic Details page here.
2. Schedule
You can schedule up to 10 Interviews within each Remesh Video Conversation. Each Interview can support up to 25 participants. You'll have the ability to analyze this data together, so scheduling interviews on the same topic within one Conversation will make analysis simple. 
On the Schedule page, you will Simply click Add Interview, complete the details about your Conversation then click Save.
3. Audience Remesh Video currently does not support our Recruit option as you are setting up your audience. Email Invitations are currently only supported if you are conducting one Interview one participant. Complete the options on the first page and click submit to see your custom action items on the next page.
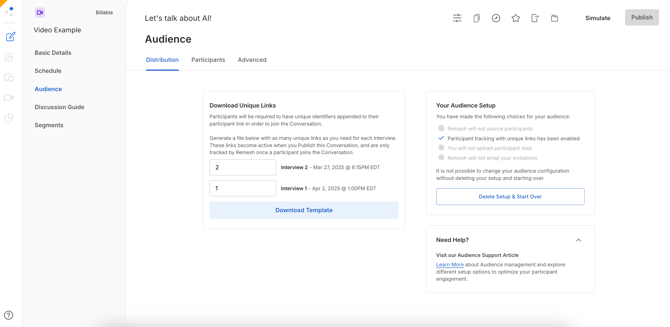
The following page will be customized to your selections. If you selected No to unique links, you will see one generic link per Interview that you can share with your participants. If you selected yes to Unique Links you will need to download a template with your Unique Links. Links will include an identifier for the Interview that the Participant has been assigned. Each unique link will be assigned to a participant you are inviting, and you will share a unique link with each participant outside the platform.
If you are also uploading participant data, you will need to also complete the template and re-upload into Remesh. You can read more about the process of uploading participant data here.
Lastly, you can change your audience settings on the Advanced tab. You can read more about these settings here.
4. Discussion Guide
You can create a Discussion Guide with pre-programmed questions to ask your participants before or after you conduct a Video interview with them.
- Onboarding Poll Questions - Single or Multi Select Polls used to collect quantitative data before you conduct your video interview.
- Can program termination and show logic.
- Can be used to program Segments.
- Read more about Onboarding Polls here!
- Pre-Interview Questions - Collect data or share text, images or videos with participants before your Video interview using any of our question types!
- Post-Interview Questions - Collect data or share text, images or videos with participants after your Video interview using any of our question types!
We suggest keeping pre- and post-interview questions to a maximum of 10 minutes each.
5. Segments
Create Segments to cut your data as you are analyzing your Conversation. You can read more about Segments and how to create them here!
6. Media Library
Upload media to your Video Conversation to easily access as you are engaging with your participants during the Video Interview. Please note these files must follow our stimuli guidelines. From the schedule page, click Media Library then Upload File, then select your file.

Moderating Your Video Interview
Once you've created and built your Video Conversation, you can begin preparing to conduct your Video Interviews.
Participants will be able to access their participant links and access any Onboarding Polls or Pre-Interview questions 10 minutes before the scheduled Conversation start time. They will not be able to request entry the Video Interview until the scheduled Conversation start time. Participants cannot join the Interview until a Moderator admits them.
- Publish your Conversation when you know that the Conversation will be conducted at the time that you have outlined, and you have your settings outlined.
- Once 10 minutes before the Conversation start time has passed, you can navigate to the Live
 page to see the Onboarding Polls and Pre-Interview questions and monitor the number of participants who have accessed their link. At this point, you will also be able to join the Video Interview.
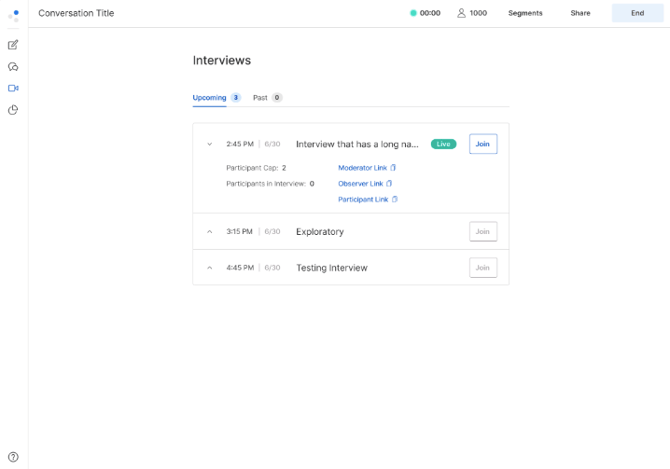
- Navigate to the Video Interview
 page and click Join when you are ready to begin your Video Interview. You will see some terms that you will need to agree to before proceeding.
Our Video Interview software is completely browser based, and you may see a pop up asking you to grant camera and microphone permissions to the software.
- You will now see the Video Interview page. Click Record to begin recording and begin letting in Participants when you are ready. You will receive a notification when Participants click the button to join your Video Interview. Choose when you are ready to let Participants in.
You must record you Video Interviews to utilize post-conversation transcription and summaries.
- Once Participants have entered the Video Interview, you will have a few settings at your disposal.
- Chat. Send chat messages to the participant group or with your stakeholders.
- Manage Participants. Mute participants, turn off their camera, or remove them from the call by clicking the three dots next to their name.

- To begin your Video Interview, simply click the unmute button and begin asking questions of your audience!
- To share images or videos with your participants click the share button then select...
- Share Screen to share an image or slide from your device.
- Upload File to upload a file and share with your participants.
- Media Library to access media you preloaded as you were building your Conversation.
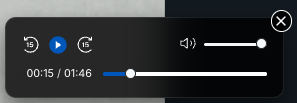
- If you share a video via Upload or Media Library, you will also see a media player that will allow you to control the volume, play/pause and what participants are seeing in the video.
Sending Remesh Questions to Participants
You can send Remesh questions directly to participants during a Video Interview. Use these questions to collect structured feedback without leaving the video room.
To send a question:
- Click Questions in the lower navigation.
- Select a question type:
- Ask Opinion: Collect open-ended responses and let participants complete the Percent Agree exercise.
- Ask Experience: Collect open-ended responses about participants’ experiences.
- Poll: Create a single-select or multi-select question.
- Rank: Ask participants to rank a list of options.
- Image or Video: Upload media for participants to view.
- Program your question and any answer options.
- Click Send.
The question will appear in the largest window of each participant’s video room. Participants can minimize the question to focus on the video feed and reopen it when they are ready to respond.
As participants submit their answers, you can review the incoming responses from the moderator screen. The question will remain available until you close it. Once the question is closed, you can send another question or continue the interview.
Backroom Chat
Please note, this feature is being released June 29th!
Backroom Chat is a private chat for your team during a Video session. Use it to coordinate without the participant seeing anything: flag a moment, suggest a follow-up question, or compare notes while the interview is running.
Backroom Chat is a tab to the right of the People and Chat tabs. Open it, type a message, and send. Everyone on staff viewing the same interview sees it in real time.
Who can see Backroom Chat:
|
Role |
Backroom Chat access |
|---|---|
|
Moderator |
Can read and post. |
|
Observer |
Can read and post. |
|
Participant |
No access. Cannot see the Backroom or its messages. |
Backroom messages are not saved. They are delivered in real time and are not stored, so there is no message history or scrollback. If you refresh, reconnect, or join the interview after messages were sent, you will not see the earlier messages. Only messages sent while you are connected appear. Backroom messages are never included in the interview transcript or recording.
Ending Your Interview
When your Video Interview has finished, click End Interview. If Post-Interview questions are programmed, ending the interview will end the Video portion for participants and take them to Post-Interview questions. If you have additional Video Interviews programmed, navigate to the Video Interview tab and join these from the same location.
What's Next?
Once you've completed and ended at least one interview, you can access our suite of Analysis tools!
Frequently Asked Questions
- Why don't I see an option to change the background of my video?
In order to change the background of your video during your interview, make sureUse graphics acceleration when availableis enabled in your browser. After making that change in your browser, you should see the option appear!