![59b7eb52c29cb1fb87e1bba7bf1ef88c41152899.png]](https://help.remesh.ai/hs-fs/hubfs/59b7eb52c29cb1fb87e1bba7bf1ef88c41152899.png?height=40&name=59b7eb52c29cb1fb87e1bba7bf1ef88c41152899.png)
This article is relevant to Live, Flex and Video Conversations. You can find more information about our product offerings here.
Overview
On the Basic Details page of your conversation you can personalize elements of your conversation. Please note that not every Conversation type will contain all the options outlined below and when utilizing Remesh Recruit.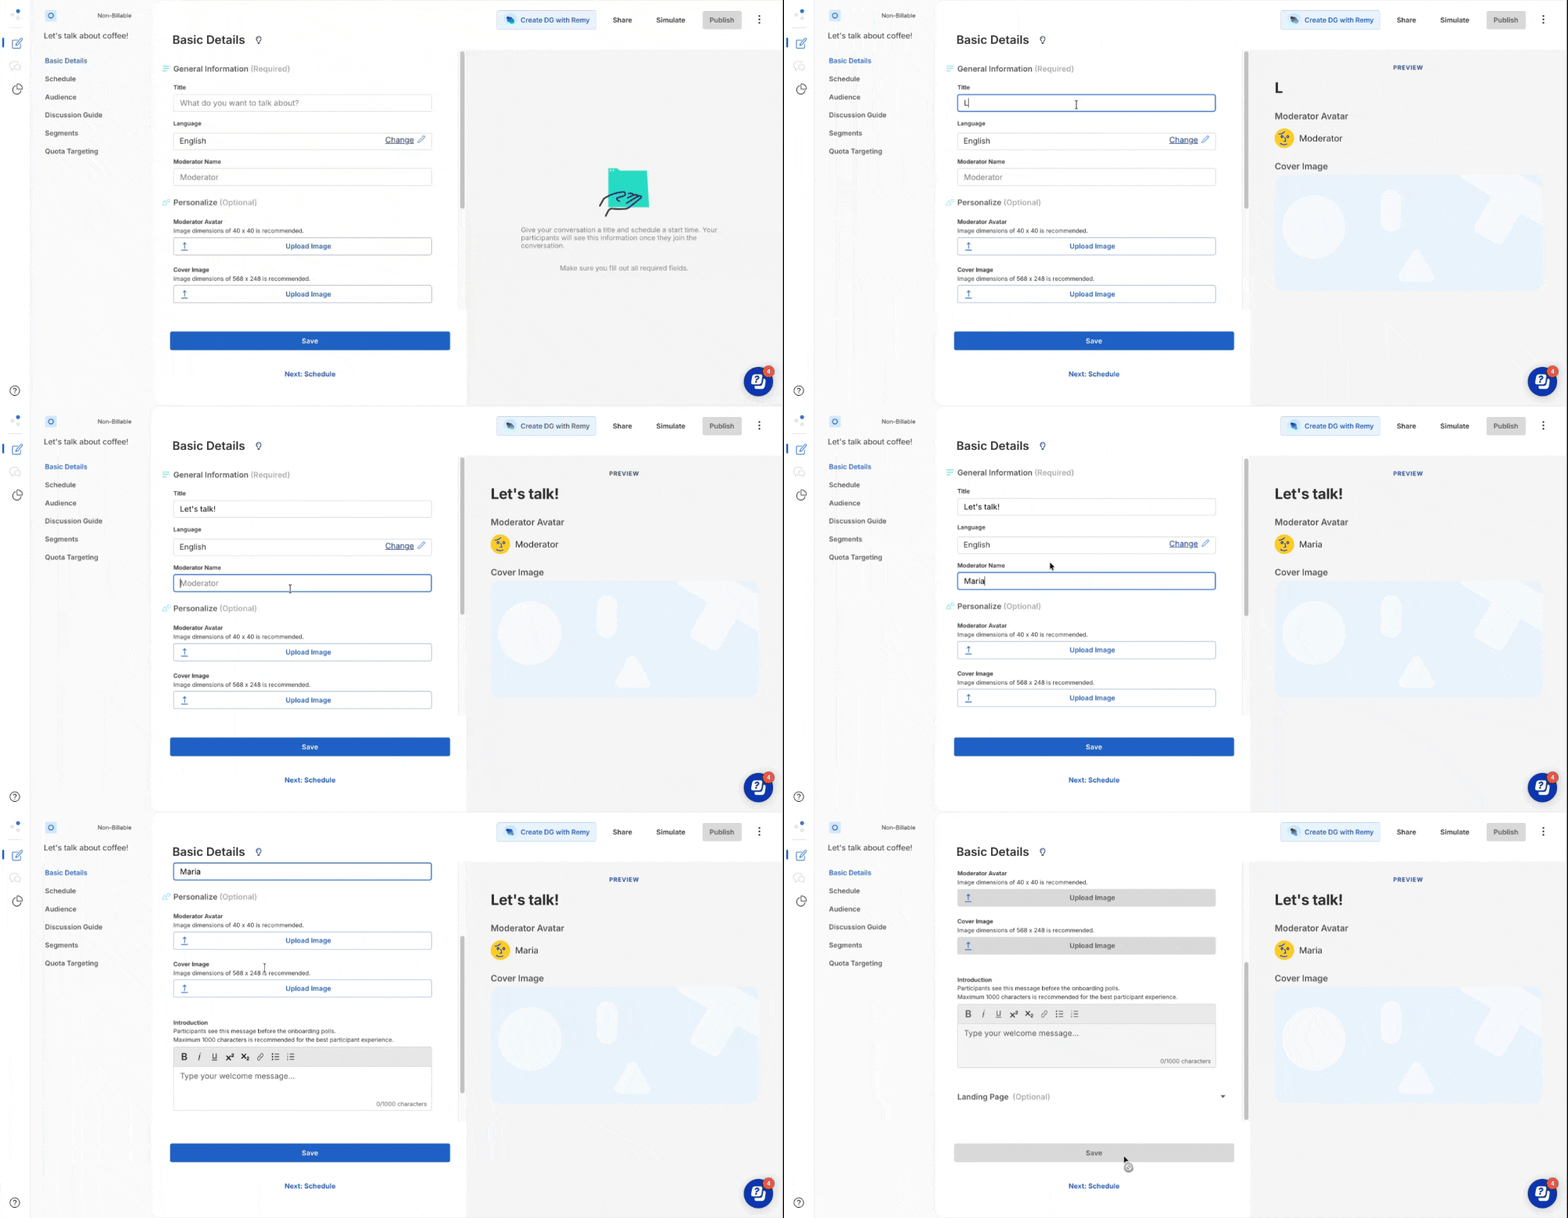
Included in this Article
Title
The title is shown to participants on the welcome screen, which is the first thing they see when they click on a participant link for a conversation that has been published.
Language
Choose the language or languages for your Conversation. If you choose one language, all participants and moderators will access the Conversation in the same language. If you are conducting a Live of Flex Conversation you can select multiple languages. This allows you to conduct a Conversation in which participants and the moderator access the Conversation in their chosen language. Learn more about Multi-Language Conversations here! To learn more about the languages we support, click here.
Moderator Name
The moderator name will appear on the welcome page of a conversation.
Moderator Avatar (Optional)
Feel free to include a picture of the Moderator of the Conversation. This image will appear on the welcome screen and next to items that are sent to participants throughout the conversation.
- Under Moderator Avatar, click Upload Image (image must be in .jpeg, .gif., or .png format and has a 2MB size limit)
- Upload the image you want the participants to see!
Cover Image (Optional)
A cover image is shown on the welcome page of a conversation
- Under Cover Image, click Upload Image (image must be in .jpeg, .gif., or .png format and has a 2MB size limit)
- Upload the image you want the participants to see!
Introduction (Optional)
Participants will see this message after the welcome screen and before the onboarding polls.
- Under Introduction, type in a welcoming message to your participants.
- There is a maximum of 1000 characters
Landing Pages (Optional)
Remesh will show a default landing page to participants as they enter the Conversation, when the Conversation is full, or when a session has ended. You can see examples of these defaults here. You have the option to override these default messages and program your own. To find these settings, scroll to the bottom of the basic details page, then click Landing Page (Optional).
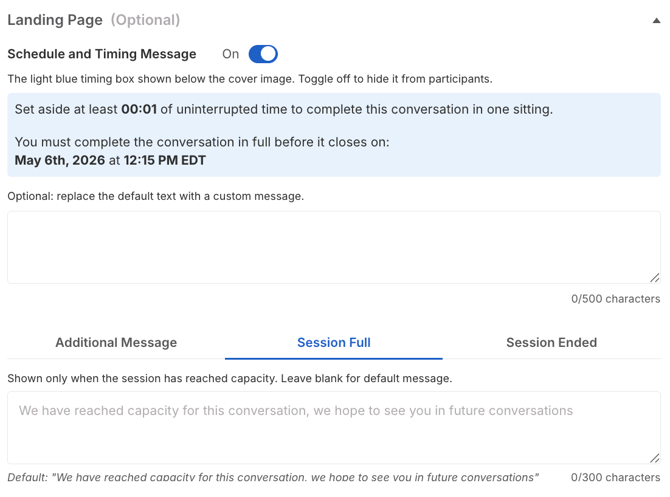
As you edit these fields, you will see a preview of the page on the right hand side of your screen.
Flex Conversations provide an estimated amount of time that it will take the participants to complete the session and when the Conversation ends on the initial landing page. You will have the option to replace this messaging. Live Conversations do have a estimated amount of time or end date on this landing page, but you have the option to add an additional custom message if you wish.
What's Next?
Keep programming your Conversation by scheduling your Conversation, then get started on writing your Discussion Guide!