![59b7eb52c29cb1fb87e1bba7bf1ef88c41152899.png]](https://help.remesh.ai/hs-fs/hubfs/59b7eb52c29cb1fb87e1bba7bf1ef88c41152899.png?height=40&name=59b7eb52c29cb1fb87e1bba7bf1ef88c41152899.png)
Before You Start
Setup has two halves, and the first half is the one people skip.
|
Half |
Who does it |
Time |
|---|---|---|
|
Part 1. Enable MCP access in Remesh (workspace and teams) |
A Remesh Workspace Administrator |
About 3 minutes, once |
|
Part 2. Connect your AI client (Claude, ChatGPT, Copilot Studio, other) |
Each user, sometimes with help from your AI vendor's admin |
About 2 minutes per person |
Remesh is an official listing in both the Anthropic Connectors Directory (Claude) and the OpenAI directory (ChatGPT), so in those two clients there is no server URL to paste and no "unverified" warning. For Copilot Studio and custom agents, the server URL is:
https://live.remesh.chat/mcp
What you can do once connected is covered in The Remesh MCP Server.
Included in This Article
- Part 1: Enable MCP Access in Remesh (Administrator)
- Part 2A: Connect Claude
- Part 2B: Connect ChatGPT
- Part 2C: Connect Microsoft Copilot Studio
- Part 2D: Connect Your Own Agent or Another MCP Client
- Verify the Connection
- Troubleshooting
- Sources and Further Reading
Part 1: Enable MCP Access in Remesh (Administrator)
You must be a Workspace Administrator in Remesh to complete this part. MCP access is opt-in and is controlled at two levels: the workspace and each team. Both are required. Turning on the workspace switch without enabling any teams means users can sign in but cannot reach any conversations or run any analysis.
Step 1. Confirm Generative AI is on
The MCP server is built on Remesh's Generative AI features and is unavailable without them.
- In the left sidebar, open Manage Workspace > Settings.
- Select the Generative AI tab.
- Confirm Enable Generative AI Features for this Workspace is on, and that the teams who will use the MCP server are enabled for Generative AI. Save if you make changes.
If the Generative AI tab is missing, Generative AI has not been provisioned for your workspace. Contact your Remesh account team.
Step 2. Acknowledge the MCP terms and turn on workspace access
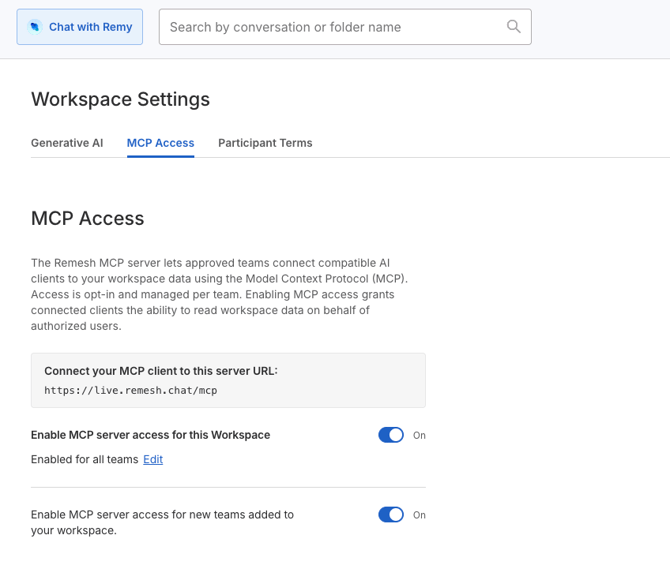
- Still in Manage Workspace > Settings, select the MCP Access tab.
- Read the description and click Acknowledge. This records that a Workspace Administrator accepted the MCP terms.
- Turn on Enable MCP server access for this Workspace.
The tab also shows your server URL. For most customers this is https://live.remesh.chat/mcp.
Step 3. Enable the teams (do not skip this)
Under the workspace toggle is a checklist of every team in your workspace.
- Check each team that should be able to use the MCP server, or click Select all. Use the search box if you have many teams.
- Decide whether Enable MCP server access for new teams added to your workspace should be on. If it is off, each new team will need to be checked here manually.
- Click Save. You will see "MCP Access settings successfully saved."
If a team has asked for access, it appears at the top of the list with a Requesting Access tag so you can approve it in one click.
Why two levels? The MCP server checks a user's team membership on every request. A user's connected AI client can only see conversations that belong to teams which are (a) checked here and (b) enabled for Generative AI. A workspace with the switch on and no teams checked looks "enabled" in settings but is unusable in practice.
Step 4. Tell your users
Send your team the client instructions below (Part 2). Users need nothing from you beyond team enablement; they sign in with their own Remesh credentials.
To turn access off later, uncheck a team, or turn off the workspace toggle. Connected clients lose access immediately. Turning off the workspace toggle also disables every team and clears the "new teams" setting.
Part 2A: Connect Claude
Works on claude.ai, Claude Desktop, Claude Mobile, Claude Code, and Cowork. Remesh is an official listing in the Anthropic Connectors Directory, so there is no URL to paste.
It can be found in the directory here: https://claude.ai/new#settings/customize-connectors/directory/remesh?q=Remesh
Individual, Pro, and Max accounts
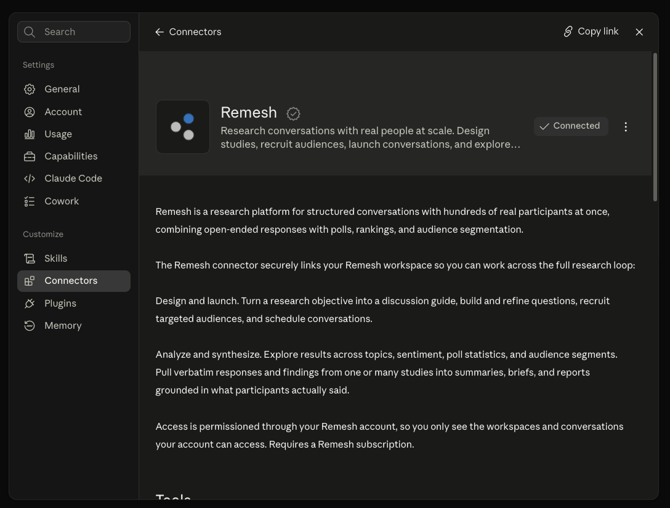
- In Claude, open Settings > Connectors (under Customize). You can also get there from a chat: click +, hover Connectors, choose Manage connectors.
- Click Add (or the + next to Connectors) and choose Browse connectors.
- Search for Remesh and select it.
- Click Connect (or Add). You may see a standard reminder about third-party connectors; this is expected for every non-Anthropic connector in the directory.
- Sign in with your Remesh email and password when the Remesh login page opens. If you belong to more than one Remesh workspace, choose the one you want Claude to work in. You can switch later by asking Claude to list your workspaces and set a different one.
- Back in Claude, Remesh appears in your Connectors list. Start a new chat and try: "List my Remesh workspaces."
Claude Team and Enterprise accounts
Organization administrators decide which directory connectors members can use.
- If Remesh already appears under "Available to your team," add it and sign in exactly as above.
- If you see a Request button instead of Connect, click Request. Your Claude admins are notified and can enable Remesh for the organization. The button changes to Requested while it is pending.
- If you are the Claude Owner or admin, open Organization settings > Connectors, find Remesh in the directory (member requests appear in a Requested by your team section), and enable it for the organization. Each member then connects and signs in with their own Remesh credentials.
Adding Claude by URL instead
Not needed now that Remesh is in the directory, but still supported: Settings > Connectors > Add > Add custom connector, server URL https://live.remesh.chat/mcp. Custom connectors are limited on the free plan and may be restricted by your organization.
Part 2B: Connect ChatGPT
Remesh is an official listing in the OpenAI directory, so ChatGPT no longer requires Developer Mode or a custom app. Available on paid ChatGPT plans (Plus, Pro, Business, Enterprise, Edu) on web and desktop.
Note on names. In 2026 OpenAI has been moving its app directory into a Plugins directory. Depending on when you read this, the menu may say Apps or Plugins, though it is listed in Plugins as of September 2026. The steps are the same.
It can be found in the directory here: https://chatgpt.com/plugins/plugin_asdk_app_6a4d000b41648191bde8e9b2e5532f16?q=Remesh
Individual accounts (Plus, Pro)
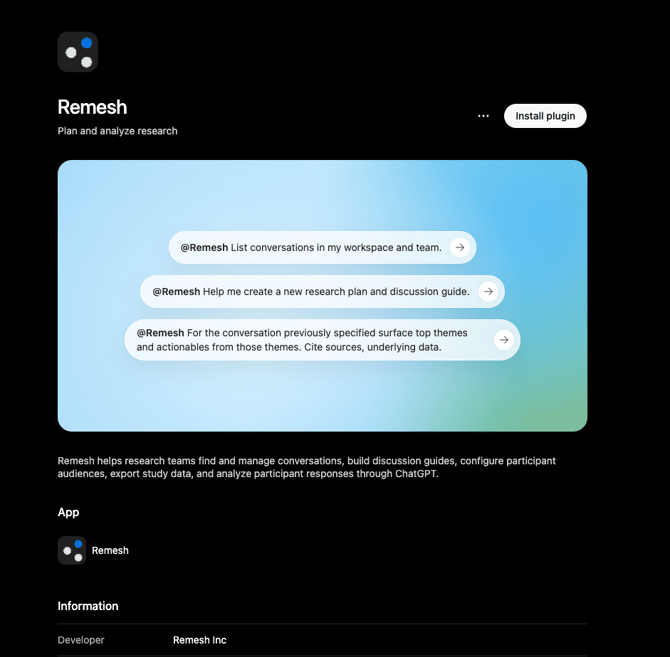
- Open the directory: go to Settings > Apps (or Plugins), or select Apps/Plugins in the sidebar, or visit chatgpt.com/plugins directly.
- Search for Remesh and open it.
- Click Connect.
- Sign in with your Remesh email and password when the Remesh login page opens, and pick a workspace if prompted.
- Remesh shows as Connected. Start a new chat and try: "List my Remesh workspaces." If ChatGPT does not call Remesh on its own, mention it by name in your prompt or pick it from the + menu in the composer.
Business, Enterprise, and Edu workspaces
Your ChatGPT workspace administrator controls which apps and plugins members can install.
- If Remesh is already available, connect it from Settings > Apps (or Plugins) exactly as above.
- If you cannot find or connect Remesh, ask your ChatGPT workspace admin to make it available.
- If you are the ChatGPT workspace admin, open Workspace settings (chatgpt.com/admin) and go to Apps or Plugins. Find Remesh, review the tools and permissions it uses, and set its installation policy to Available (members may install) or Installed (installed for everyone) for the roles you want. Members then sign in with their own Remesh credentials the first time they use it. On Enterprise and Edu, third-party apps are typically off by default until an admin enables them.
If you set up Remesh in ChatGPT before September 2026
You may have a workspace-created "Remesh MCP" custom app from the Developer Mode flow. It keeps working. When convenient, remove it and connect the directory listing instead so you receive updates and no longer see the "unverified" warning.
Part 2C: Connect Microsoft Copilot Studio
Remesh is not listed in the Microsoft directory. Copilot Studio still supports it: MCP servers are attached as tools on a Copilot Studio agent by a maker, and that agent can then be used in Copilot Studio, Microsoft Teams, or Microsoft 365 Copilot once published. There is no end-user "add a connector" option in the Copilot chat app itself.
Follows Microsoft's documentation, Connect your agent to an existing MCP server. Field names may drift as Copilot Studio evolves.
Before you start. You need Copilot Studio maker access in your Power Platform environment. The agent must have generative orchestration turned on. Your organization's Power Platform data loss prevention (DLP) policies apply; if the connection is blocked, a Power Platform admin needs to allow it.
- In Copilot Studio, open or create the agent and go to its Tools page.
- Select Add a tool > New tool > Model Context Protocol.
- Fill in the wizard:
|
Field |
Value |
|---|---|
|
Server name |
Remesh |
|
Server description |
Remesh research platform: browse and build conversations and run cited analysis on your Remesh workspace data |
|
Server URL |
https://live.remesh.chat/mcp |
|
Authentication |
OAuth 2.0 > Dynamic discovery |
- Click Create, then Next. Select Create a new connection, sign in with your Remesh credentials, and select Add to agent.
- On the agent's Tools tab, open Remesh to see the tool list. All tools are on by default (Allow all). To restrict the agent to analysis only, turn off Allow all and toggle individual tools.
- Test in the agent's test pane: "List my Remesh workspaces."
The server description matters more here than in other clients. Copilot's orchestrator uses it to decide when to call Remesh at runtime.
Part 2D: Connect Your Own Agent or Another MCP Client
MCP is an open standard, so nothing about the Remesh server is tied to a vendor. Cursor, Claude Code, and other MCP clients connect by URL. In-house agents can connect if they can act as an MCP client.
What a client needs
- MCP client support with Streamable HTTP transport (the server is remote; nothing is installed locally, and your environment needs outbound HTTPS access to live.remesh.chat).
- OAuth 2.0 with PKCE and dynamic client registration. Users authenticate through a browser sign-in with their Remesh credentials. There are no static API keys.
Point the client at https://live.remesh.chat/mcp and complete the sign-in. Most current agent frameworks (Claude Agent SDK, OpenAI Agents SDK and Responses API, LangChain/LangGraph, Vercel AI SDK, Semantic Kernel, Bedrock agents) have MCP client support built in. If yours uses plain function calling, the official MCP SDKs add a client layer that handles discovery, tool calls, and OAuth.
Plan for
- Per-user sign-in. Access is scoped to each signed-in Remesh user. Do not route many people through one shared login; it concentrates one person's access and rate limits across everyone.
- Rate limits. Requests are limited per workspace and per user. Handle throttling with backoff and retry.
- Citations. Analysis tools return [N] markers with a parallel citations array. Render them as links back to Remesh rather than dropping them.
- Headless automation (no human signing in) does not fit the per-user model today. Talk to your Remesh account team about your use case.
Verify the Connection
In any client, try:
- "Ping the Remesh MCP to check connectivity."
- "List my Remesh workspaces."
- "List my teams and recent conversations in Remesh."
- "What were the top themes by agreement in [conversation name]?"
A working setup returns your workspace and team names, and analysis answers include [N] citations that link back to Remesh.
Troubleshooting
I signed in successfully, but every request says I have no team memberships, or returns "not authorized" or "team scope denied." This is the most common issue. MCP access is on for your workspace but not for your team. A Workspace Administrator needs to open Manage Workspace > Settings > MCP Access, check your team, and save. The team must also be enabled on the Generative AI tab. Until then, your client can sign in but cannot reach any conversations.
The Remesh login page says I have no MCP-enabled workspaces. None of your workspaces has both Generative AI and MCP access enabled. Ask your Workspace Administrator to complete Part 1.
I do not see the MCP Access tab in Workspace Settings. Either you are not a Workspace Administrator, or Generative AI is not enabled and approved for the workspace (the MCP Access tab only appears once it is). Check the Generative AI tab first, or contact your account team.
I can see some conversations but not others. You only see conversations you can access in Remesh, in the selected workspace, on teams enabled for MCP. Switch workspaces by asking your client to list your workspaces and set a different one, or ask an administrator about team access.
I cannot find Remesh in Claude's Connectors Directory, or I only see a Request button. Search under the Connectors tab of the directory (Settings > Connectors > Add > Browse connectors). On Team and Enterprise plans, a Claude admin may need to enable Remesh for the organization first; use the Request button to notify them.
I cannot find or connect Remesh in ChatGPT. On Business, Enterprise, and Edu workspaces, an admin must make the app available in Workspace settings > Apps (or Plugins). On individual plans, confirm you are on a paid plan and using the web or desktop app.
I see an "unverified" or "risk" warning in ChatGPT. You are connecting an old custom app, not the directory listing. Remove it and connect Remesh from the directory instead.
Copilot Studio: the connection is blocked or the MCP option is missing. Either generative orchestration is off for the agent, or a Power Platform DLP policy is blocking the connector. See Microsoft's MCP troubleshooting page.
Requests are being throttled. The server is rate limited per workspace and per user, and Remy flows have a small per-workspace concurrency cap. Wait a moment and retry.
My session expired. Sign-in tokens refresh automatically for 24 hours of use. After that, or after an administrator changes access, your client will prompt you to sign in to Remesh again.
Sources and Further Reading
- Connectors Directory and Connector verification, Claude documentation
- Use connectors to extend Claude's capabilities, Claude Help Center
- Plugins in ChatGPT and Codex, OpenAI Help Center
- Apps and connectors: plugin controls, ChatGPT Enterprise documentation
- Connect your agent to an existing MCP server, Microsoft Copilot Studio
- Model Context Protocol, official docs and SDKs